
What to Look for in a 12V DC Refrigerator Compressor
Building your own DC fridge, cooler box, or portable refrigerator starts with one decision that determines everything else: the compressor. The 12V DC refrigerator compressor is the heart of any DIY cooling build — it is the component that actually moves heat, and its specifications dictate your cooler’s capacity, efficiency, runtime, and reliability.
Most people start their search by looking at cooling capacity (watts or BTU). That matters, but it is only one of six factors that determine whether your build succeeds or ends up as an expensive box that barely gets cold. This guide covers all of them.
Factor 1: Cooling Capacity — How Cold and How Much
Cooling capacity tells you how much heat the compressor can remove per unit of time. It is measured in watts (W) or BTU per hour. For a DIY refrigerator or cooler:
- 50-150W (170-510 BTU): Small personal coolers, beverage fridges, cosmetic fridges. Suitable for volumes under 30 liters in moderate ambient temperatures.
- 150-300W (510-1,025 BTU): Medium cooler boxes, portable fridges for camping or overlanding. Handles 30-80 liters with good insulation.
- 300-455W (1,025-1,550 BTU): Large DIY fridges, chest-style coolers, marine refrigerators. Handles 80-150+ liters or freezer applications where you need to push below 0°C.
- 450W+ (1,550+ BTU): Dedicated freezers, multi-zone fridge-freezer combos, or high-ambient applications (vehicle roof boxes in desert heat).
The RIGID QX1901VDL(H) covers the full range with variable speed from 100W to 455W (360-1,550 BTU), making it versatile enough for everything from a small beverage cooler to a large chest fridge. Variable speed means you are not locked into one capacity — the compressor adjusts its output to match the load, running at minimum speed once the target temperature is reached.
Factor 2: Variable Speed vs Fixed Speed
This is the most underappreciated spec in DIY fridge builds.
A fixed-speed compressor runs at one speed. When the fridge needs cooling, it turns on at full power. When it reaches temperature, it turns off completely. This on-off cycling has three problems: it wastes energy during startup (highest power draw), creates temperature fluctuations inside the fridge (warm when off, cold when on), and puts mechanical stress on the compressor with every cycle.
A variable-speed (inverter) compressor adjusts its speed continuously. It ramps up when the fridge is warm and slows down as it approaches the target temperature, eventually running at minimum speed to maintain. This means lower average power consumption (30-50% less than fixed-speed in most real-world conditions), stable temperatures (better for food preservation and sensitive items), and longer compressor life (fewer start-stop cycles).
For a battery-powered DIY fridge, variable speed is not optional — it is the difference between 6 hours of runtime and 12 hours on the same battery. The RIGID QX1901VDL(H) uses a BLDC variable-speed motor for exactly this reason.
Factor 3: Size and Weight
A 12V DC refrigerator compressor needs to fit inside whatever you are building. If you are converting an old cooler box, every cubic inch matters. If you are building into a van, weight affects fuel economy and payload capacity.
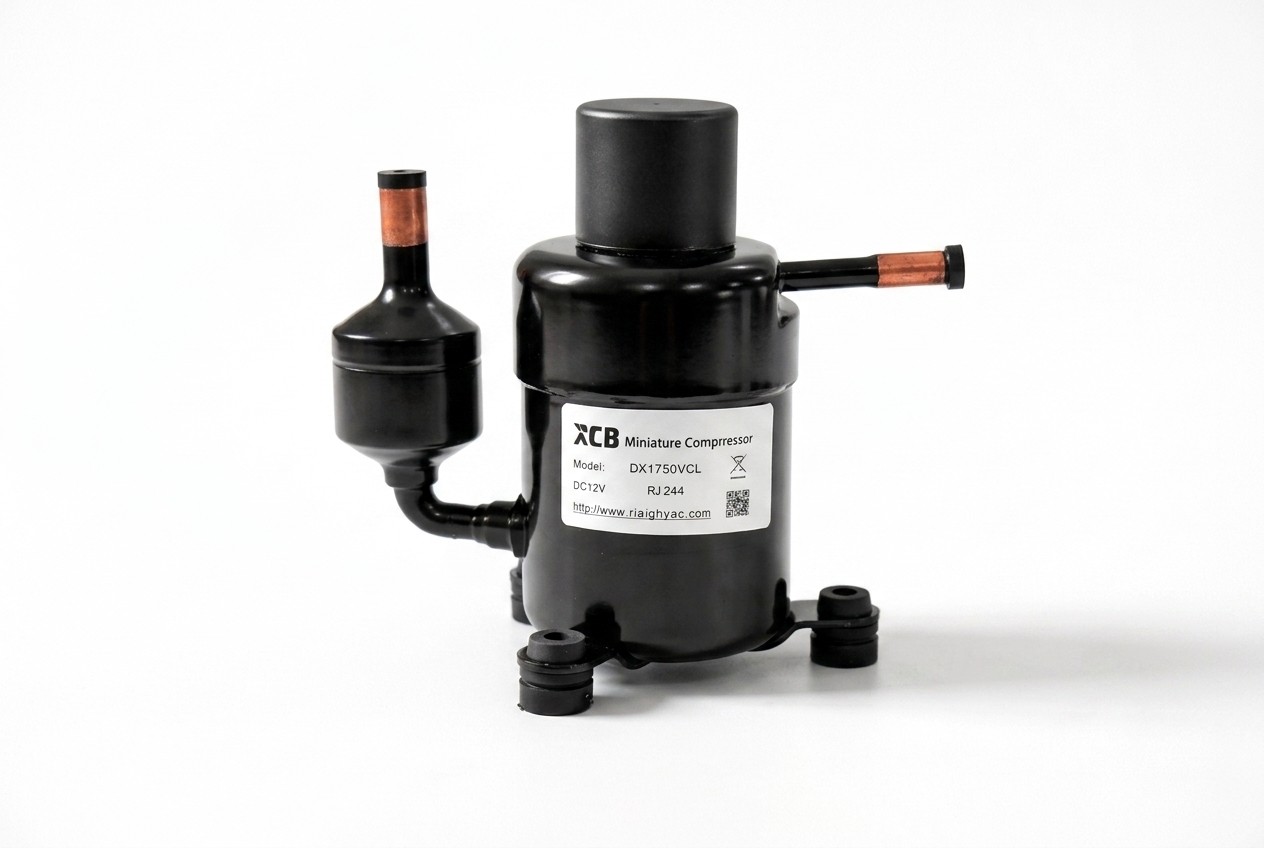
The RIGID QX1901VDL(H) weighs just 1.6 pounds (0.72 kg) — roughly the weight of a can of beans. It is one of the smallest compressors commercially available, which gives you maximum flexibility in where and how you mount it. By comparison, many household refrigerator compressors weigh 8-15 kg and would never fit in a DIY portable build.
Small size also means the compressor takes up minimal internal volume, leaving more space for actual storage inside your fridge. In a 50-liter cooler build, a large compressor might steal 10-15 liters of usable space. The QX1901VDL(H) takes almost nothing.
Factor 4: Refrigerant Compatibility
The refrigerant determines the temperature range your fridge can achieve and has regulatory implications.
- R134a: The standard for most small DC compressors. Works well for refrigerator temperatures (0°C to 10°C) and moderate freezer applications (down to about -20°C with proper system design). Widely available, well-understood, and compatible with common components. The RIGID QX1901VDL(H) uses R134a.
- R290 (propane): Lower global warming potential than R134a and slightly better thermodynamic efficiency. Available in some RIGID models. Requires appropriate safety measures due to flammability, but charge quantities in micro compressors are very small (typically under 50g).
- R600a (isobutane): Common in household fridges. Good efficiency but flammable. Less commonly used in DIY 12V builds because fewer compatible DC compressors are available.
For most DIY builders, R134a is the practical choice. It works, it is safe, and you can find compatible components (evaporators, condensers, capillary tubes, driers) easily.
Factor 5: Voltage and Power System
A 12V DC refrigerator compressor runs directly from a 12V battery — no inverter needed. This is a significant advantage over repurposing a household AC compressor, which requires a large, heavy, and inefficient inverter to convert 12V DC to 120/220V AC.
Direct DC operation means:
- No inverter losses (typically 10-15% wasted as heat)
- Simpler wiring and fewer components
- Higher reliability (one fewer point of failure)
- Works directly with vehicle electrical systems, solar panels, and portable battery packs
For the QX1901VDL(H) at full capacity (455W), maximum current draw is approximately 38A at 12V. At variable-speed minimum (100W), draw drops to roughly 8A. Real-world average for a maintained fridge is typically 10-20A depending on insulation, ambient temperature, and setpoint.
Factor 6: Driver Board and Controls
A BLDC compressor needs an electronic driver board (controller) to run. Some compressors come with an integrated driver; others require you to purchase or build one separately.
The RIGID QX1901VDL(H) includes a sine wave variable-speed driver board with dual automatic protection (over-current and over-temperature). This simplifies DIY builds significantly — you connect power, connect a temperature sensor or control signal, and the board handles compressor speed, startup, and protection automatically.
Key driver features to look for:
- Speed control input: Potentiometer, 0-5V analog, PWM, or TTL signal options let you integrate the compressor with a thermostat, microcontroller (Arduino, ESP32), or simple manual knob.
- Soft start: Ramps up the compressor gradually, reducing startup current surge and extending compressor life.
- Protection circuits: Over-current, over-temperature, and under-voltage protection prevent damage from wiring mistakes, overload, or low battery.

Putting It Together: DIY Fridge Build Basics
A complete DIY fridge requires these components beyond the compressor:
- Evaporator: The cold side — a coil or plate inside the fridge that absorbs heat. Aluminum roll-bond evaporators are common for DIY builds. Size it to match your compressor’s capacity.
- Condenser: The hot side — a coil or finned tube that rejects heat to the outside. Air-cooled condensers with a small fan are the simplest option. Size for at least 1.5x the compressor’s cooling capacity to handle high ambient temperatures.
- Capillary tube (or expansion valve): Controls refrigerant flow between the high-pressure and low-pressure sides. Capillary tubes are simpler for DIY builds; expansion valves offer better efficiency but require more expertise to set up.
- Filter drier: Removes moisture and contaminants from the refrigerant. Small, cheap, and essential — never skip this component.
- Refrigerant: R134a for the QX1901VDL(H). The system needs the correct charge amount — too little and it won’t cool; too much and it can damage the compressor. Follow the compressor manufacturer’s charge specification exactly.
- Insulation: The cabinet itself. Minimum 50mm polyurethane foam for a fridge, 75-100mm for a freezer. Insulation quality determines your runtime more than any other single factor.
The RIGID 12V compressor comes pre-charged with oil and ready for integration. You supply the rest of the system components, braze or clamp the connections, evacuate the system, charge with refrigerant, and power up.
Common DIY Mistakes to Avoid
- Undersizing insulation. A 25mm foam wall loses heat twice as fast as a 50mm wall. Every watt of heat ingress is a watt the compressor must remove, draining your battery faster. Insulation is the cheapest performance upgrade you can make.
- Incorrect refrigerant charge. Too little refrigerant means poor cooling and compressor overheating. Too much means liquid refrigerant reaching the compressor (liquid slugging), which can destroy it. Use a scale and follow the specification exactly.
- Poor condenser airflow. The condenser must reject heat efficiently. Mounting it in an enclosed space with no air movement defeats its purpose. Ensure clearance for airflow and add a small 12V fan if natural convection is insufficient.
- Ignoring moisture in the system. Moisture in a refrigeration system forms acid that corrodes components and ice that blocks capillary tubes. Always install a filter drier, evacuate the system with a vacuum pump before charging, and use dry refrigerant from a sealed container.
- Undersized wiring. At 12V, current is high. A compressor drawing 20A through thin wire creates voltage drop, heat, and potential fire risk. Use at least 10 AWG wire for runs under 2 meters, with proper fusing at the battery terminal.
Capacity Planning: Matching Compressor to Fridge Size
A rough guide for well-insulated (50mm+ foam) DIY fridges in moderate ambient conditions (up to 35°C):
| Fridge Volume | Target Temp | Suggested Capacity | QX1901VDL(H) Speed Setting |
|---|---|---|---|
| 10-30 liters | 5°C (fridge) | 80-120W | Low-medium |
| 30-60 liters | 5°C (fridge) | 120-200W | Medium |
| 60-100 liters | 5°C (fridge) | 200-350W | Medium-high |
| 30-60 liters | -18°C (freezer) | 200-350W | Medium-high |
| 60-100 liters | -18°C (freezer) | 350-455W | High |
Note: These are starting estimates for initial sizing. Actual performance depends on insulation quality, ambient temperature, door opening frequency, and food load. Freezer applications require substantially more capacity than fridge applications because of the larger temperature differential.
Applications Beyond DIY Fridges
While this guide focuses on DIY fridge builds, a 12V DC refrigerator compressor serves many other cooling projects:
Wine and Beverage Coolers
Custom wine coolers for boats, RVs, or home bars benefit from precise temperature control. A variable-speed compressor maintaining 12-14°C (54-57°F) runs quietly at minimum speed most of the time, using very little power while keeping your collection at the perfect serving temperature.
Medical and Scientific Cold Storage
Insulin storage, vaccine transport, sample preservation, and reagent cooling all require reliable, portable refrigeration. A 12V DC compressor with a digital thermostat controller provides the temperature stability these applications demand, running from a vehicle battery or portable power pack during field work.
Fishing and Hunting Coolers
Replacing ice in a cooler with a compressor-based system means your catch stays at consistent temperature for days without melting ice, water buildup, or repeated ice runs. Build the compressor into a marine-grade cooler box with 75mm insulation and you have a fishing cooler that maintains 2°C for as long as you have battery power.
Vehicle-Based Food Service
Food trucks, mobile catering, and delivery vehicles often need custom refrigeration that fits specific vehicle dimensions. A 12V DC compressor lets you build refrigeration into any vehicle without running a generator or needing 120V power — the vehicle’s alternator keeps the battery charged while driving, and the fridge maintains temperature during delivery stops.
Frequently Asked Questions
Can I use a 12V DC refrigerator compressor to build a freezer?
Yes. The QX1901VDL(H) can achieve evaporator temperatures well below 0°C with proper system design. For freezer applications (-18°C), you need thicker insulation (75-100mm foam), a larger condenser, and the compressor running at higher speed settings. Cooling capacity decreases as evaporator temperature drops, so plan for 30-50% less effective capacity at freezer temperatures compared to fridge temperatures.
How long will it run on a battery?
Depends on the battery capacity, compressor speed, and duty cycle. At average draw of 15A (moderate fridge, well insulated), a 100Ah LiFePO4 battery provides roughly 5-6 hours. A 200Ah battery doubles that. With solar charging, runtime becomes essentially unlimited. The variable speed feature significantly extends runtime compared to fixed-speed compressors — at minimum speed, draw can be as low as 8A.
Do I need special tools?
Basic DIY fridge builds require a vacuum pump (for system evacuation), a manifold gauge set (for monitoring pressures), a brazing torch or compression fittings (for connections), and a refrigerant scale (for accurate charging). You can rent or buy these tools for $100-300 total. Flare or compression fittings reduce the need for brazing skill.
Is it cheaper to build a fridge or buy one?
Building a custom DC fridge typically costs $300-600 in components (compressor, evaporator, condenser, insulation, hardware) versus $500-1,500 for a comparable commercial DC fridge. The DIY route makes sense when you need custom dimensions, specific performance characteristics, or enjoy the build process. Commercial units win on convenience and warranty.
Bottom Line
A 12V DC refrigerator compressor is the foundation of any DC fridge build. Choose one with variable speed for efficiency and battery life, correct capacity for your fridge volume and target temperature, and an included driver board for simplicity. The RIGID QX1901VDL(H) checks all these boxes at 1.6 lbs with 100-455W of variable cooling capacity — enough flexibility for builds ranging from a personal beverage cooler to a large expedition chest fridge. Get the compressor right, insulate well, and the rest of the build falls into place.