
Compact Lab Chiller: Countertop and Under-Bench Cooling That Actually Works
Laboratory space is expensive and never quite enough. Between analytical instruments, glassware, computers, and reagent bottles, the average research bench is already at capacity. So when your rotary evaporator, laser system, or reaction vessel needs active cooling, the last thing you want is a refrigerated circulator the size of a filing cabinet parked next to it.
Traditional recirculating chillers were designed for an era when labs had more floor space. They’re heavy, often 40–60 kg, loud enough to require hearing protection nearby, and demand dedicated floor space with clearance on multiple sides for airflow. For many modern labs, that’s simply not realistic.
But here’s the thing: you still need real cooling performance. You still need to hold a condenser at -20°C or maintain a reaction jacket within a fraction of a degree. The question isn’t whether you need a chiller — it’s whether a genuinely compact laboratory chiller can deliver the performance your work demands without consuming space you don’t have.
This guide walks through what makes a chiller truly compact, what performance you can expect at small scale, and how to evaluate placement for your specific lab.
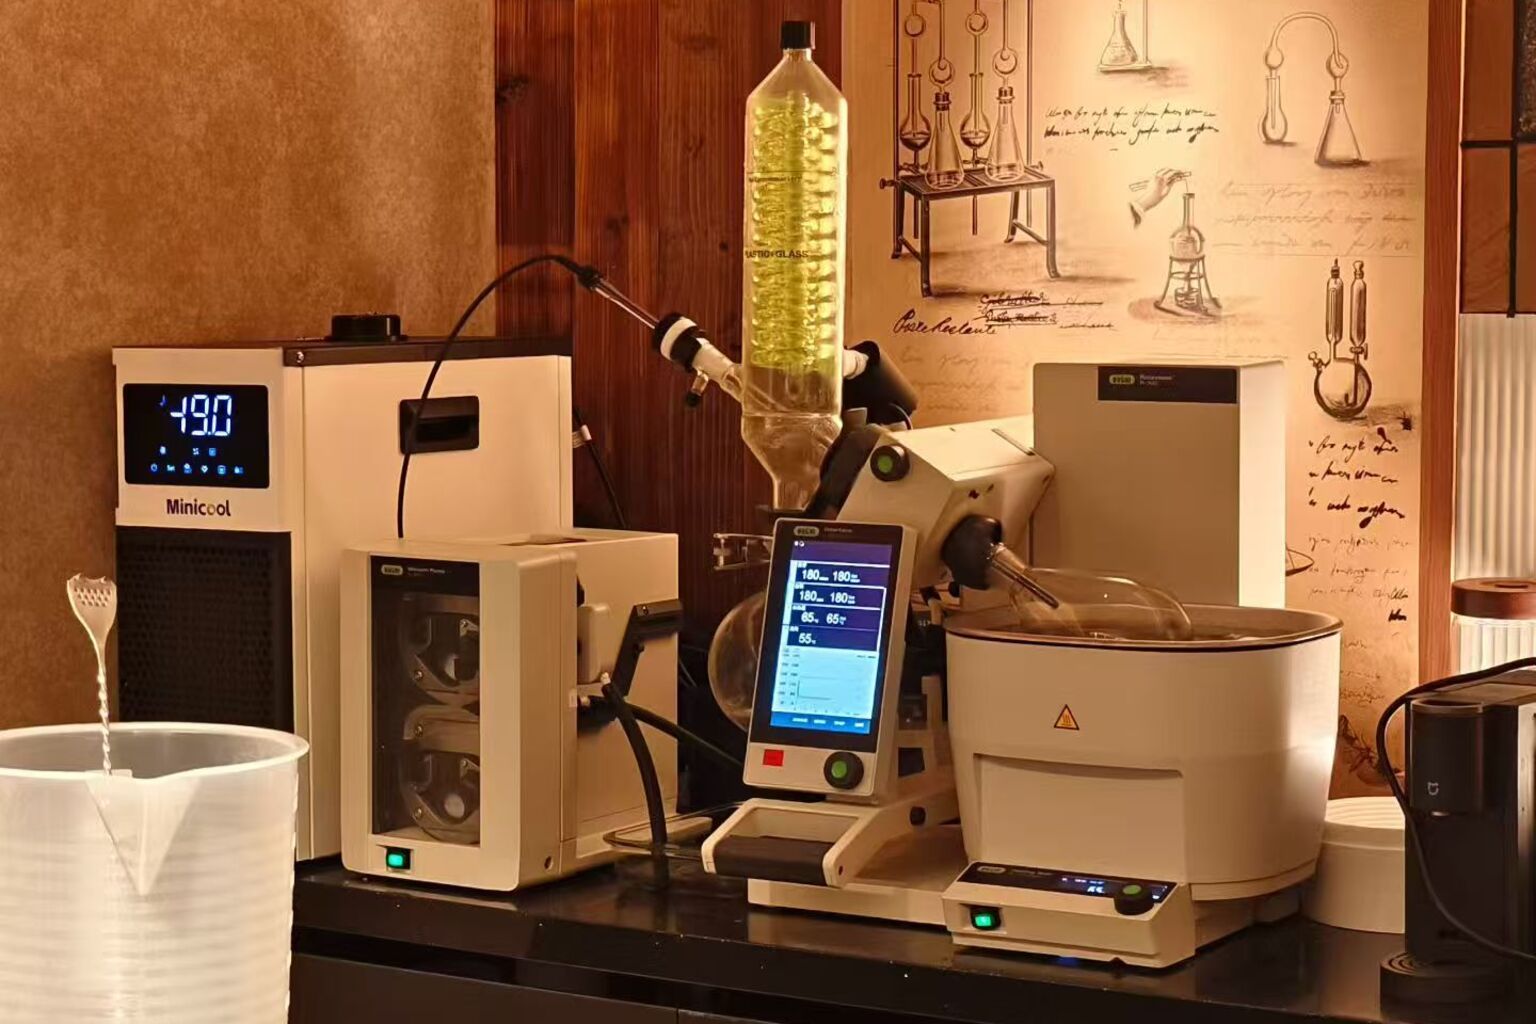
Why a Compact Laboratory Chiller Matters More Than You Think
The push toward smaller cooling equipment isn’t just about convenience. It reflects real constraints that researchers face every day — constraints that directly affect experimental outcomes, safety compliance, and lab productivity.
Fume hoods have limited interior space
If your cooling application sits inside a fume hood — common with solvent evaporation, reactive chemistry, or any process generating fumes — you’re working within a fixed volume. A standard 1.2-meter fume hood has roughly 50–60 cm of usable depth. Place a large chiller inside, and you’ve lost most of your working area. Some researchers resort to running long coolant lines from a chiller outside the hood, which introduces heat gain, potential leak points, and tripping hazards.
Shared benches can’t accommodate large floor-standing units
In multi-user labs, bench space is allocated — sometimes down to specific shelf sections. You can’t simply commandeer a square meter of floor space for a chiller when three other researchers share the same bay. A compact unit that sits on your assigned bench section or tucks underneath it respects the shared environment.
New labs are designed smaller and denser
Modern laboratory design trends favor smaller individual lab rooms with more specialized equipment per square meter. The open-plan mega-lab is giving way to focused research cells. In these environments, every piece of ancillary equipment — chillers, vacuum pumps, gas generators — needs to justify its spatial footprint against the primary instruments it supports.
Equipment relocation is common
Labs aren’t static. Instruments move between rooms, buildings, even campuses. A chiller that weighs 50 kg and requires two people plus a dolly to relocate creates friction every time your workflow changes. A unit light enough for one person to carry means your cooling goes wherever your experiment goes, without scheduling facilities staff or waiting for moving equipment.
What Makes a Chiller Genuinely Compact vs. Just “Smaller”
Many manufacturers describe their chillers as “compact” or “benchtop” without providing the dimensional context that actually matters for lab placement. A chiller can be smaller than a floor-standing unit and still be far too large, heavy, or loud for practical bench-adjacent use. Here are the thresholds that separate marketing language from genuine compactness.
Footprint: under 25 cm × 45 cm is true countertop territory
Standard laboratory bench depth is typically 60–75 cm. Once you account for items pushed against the back wall (bottles, tubing, monitors), your usable front area might be 40–50 cm deep. A chiller footprint under 25 cm wide and 45 cm deep fits comfortably beside most instruments without overhanging the bench edge or blocking access to adjacent equipment.
For comparison, a typical desktop printer is around 40 cm × 35 cm. If your chiller is substantially larger than that, it’s not a benchtop unit in any meaningful sense — it’s a floor unit that someone put on a bench.
Weight: under 25 kg means one person can move it
Ergonomic lifting guidelines suggest 23 kg as a reasonable maximum for a single person to lift from bench height without significant injury risk. A chiller under 25 kg — ideally under 20 kg — means one researcher can reposition it between setups, move it to a different bench, or place it on a lower shelf without assistance.
This matters more than it might seem. If moving your chiller requires scheduling help, you’ll leave it in suboptimal positions. You’ll run longer tubing. You’ll tolerate inconvenient placement. Weight directly impacts how flexibly you can use the equipment.
Height: fits under standard bench (typically 70–80 cm clearance)
Under-bench placement is often the most space-efficient option, keeping the chiller out of your working area entirely. Standard lab benches provide 70–80 cm of clearance between the floor (or lower shelf) and the underside of the bench top. Your chiller’s total height — including any upward-facing connections, coolant reservoir caps, or exhaust vents — needs to fit within this envelope with room for airflow above.
A unit that’s 45 cm tall fits comfortably. One that’s 65 cm tall might fit but leaves minimal clearance for air circulation or accessing connections. Anything over 70 cm effectively can’t go under a bench.
Noise: below 50 dB for bench-adjacent placement
Noise matters enormously when equipment operates at arm’s length from your ears for hours at a time. For reference, normal conversation is about 60 dB, and a quiet office is around 40 dB. A chiller running at 55–60 dB on the bench beside you is noticeable and fatiguing over a full workday.
Below 50 dB — roughly the level of a residential refrigerator — is the threshold where most researchers can work comfortably alongside the unit without raising their voice to communicate with colleagues or experiencing concentration fatigue.
Performance Expectations at Compact Size
A reasonable concern with any compact laboratory chiller is whether shrinking the physical package means accepting inadequate cooling performance. A decade ago, that concern was largely justified. Modern compressor technology, improved heat exchangers, and better insulation have changed the equation significantly.
450W to 1kW cooling capacity is achievable in compact form
Current miniaturized compressor designs can deliver 450W to over 1kW of cooling capacity within a package small enough for bench placement. This covers the thermal load of most common laboratory applications: rotary evaporator condensers, small reaction jackets, laser cooling loops, analytical instrument thermal management, and recirculating bath temperature control.
For context, a typical 2L rotary evaporator condenser operating with common solvents requires roughly 200–400W of cooling at steady state. A small jacketed reactor at moderate exotherm might need 300–600W. A compact chiller in the 450W–1kW range handles these applications with headroom to spare.
Temperature range to -40°C is possible with modern compressor technology
Low-temperature performance used to demand large compressors with substantial heat dissipation requirements — essentially forcing large enclosures. Advances in variable-speed DC compressor technology now allow sustained operation at -40°C in packages that fit on a bench. This opens up applications like cold-trap condensation, low-temperature reactions, and cryogenic sample preparation without dedicating floor space to the cooling equipment.
Precision ±0.1°C doesn’t require large thermal mass
Temperature stability is often conflated with reservoir volume. The thinking goes: larger reservoir equals more thermal inertia equals more stable temperature. In practice, modern PID control algorithms paired with variable-speed compressors can maintain ±0.1°C precision with relatively small internal volumes. The compressor modulates its output continuously rather than cycling on and off, eliminating the temperature oscillation that plagued older fixed-speed designs.
Trade-off: smaller reservoir means faster response but less buffer
The genuine trade-off with compact chillers is thermal buffer capacity. A smaller internal reservoir responds quickly to setpoint changes — useful for protocols requiring temperature ramping — but has less capacity to absorb sudden heat spikes without a temporary temperature excursion.
In practice, this means a compact chiller handles steady-state loads and gradual changes excellently, but if your application involves sudden, large thermal dumps (like quenching a highly exothermic reaction), you may see a brief temperature rise before the system catches up. For most laboratory applications, this response time is measured in seconds and doesn’t affect outcomes.
Placement Options for Compact Lab Chillers
One of the main advantages of a genuinely compact chiller is placement flexibility. Rather than being locked into one position dictated by the unit’s size, you can choose the location that best serves your workflow.
On the bench, next to your instrument
The most straightforward placement: chiller sits on the same bench surface as your rotovap, reactor, or analytical instrument. This minimizes coolant line length (reducing thermal losses and pressure drop), keeps all connections visible and accessible, and allows you to monitor the chiller display without moving from your working position.
Requirements: footprint must fit within your allocated bench space, weight must be safe for the bench’s load rating, and noise must be tolerable at close range.
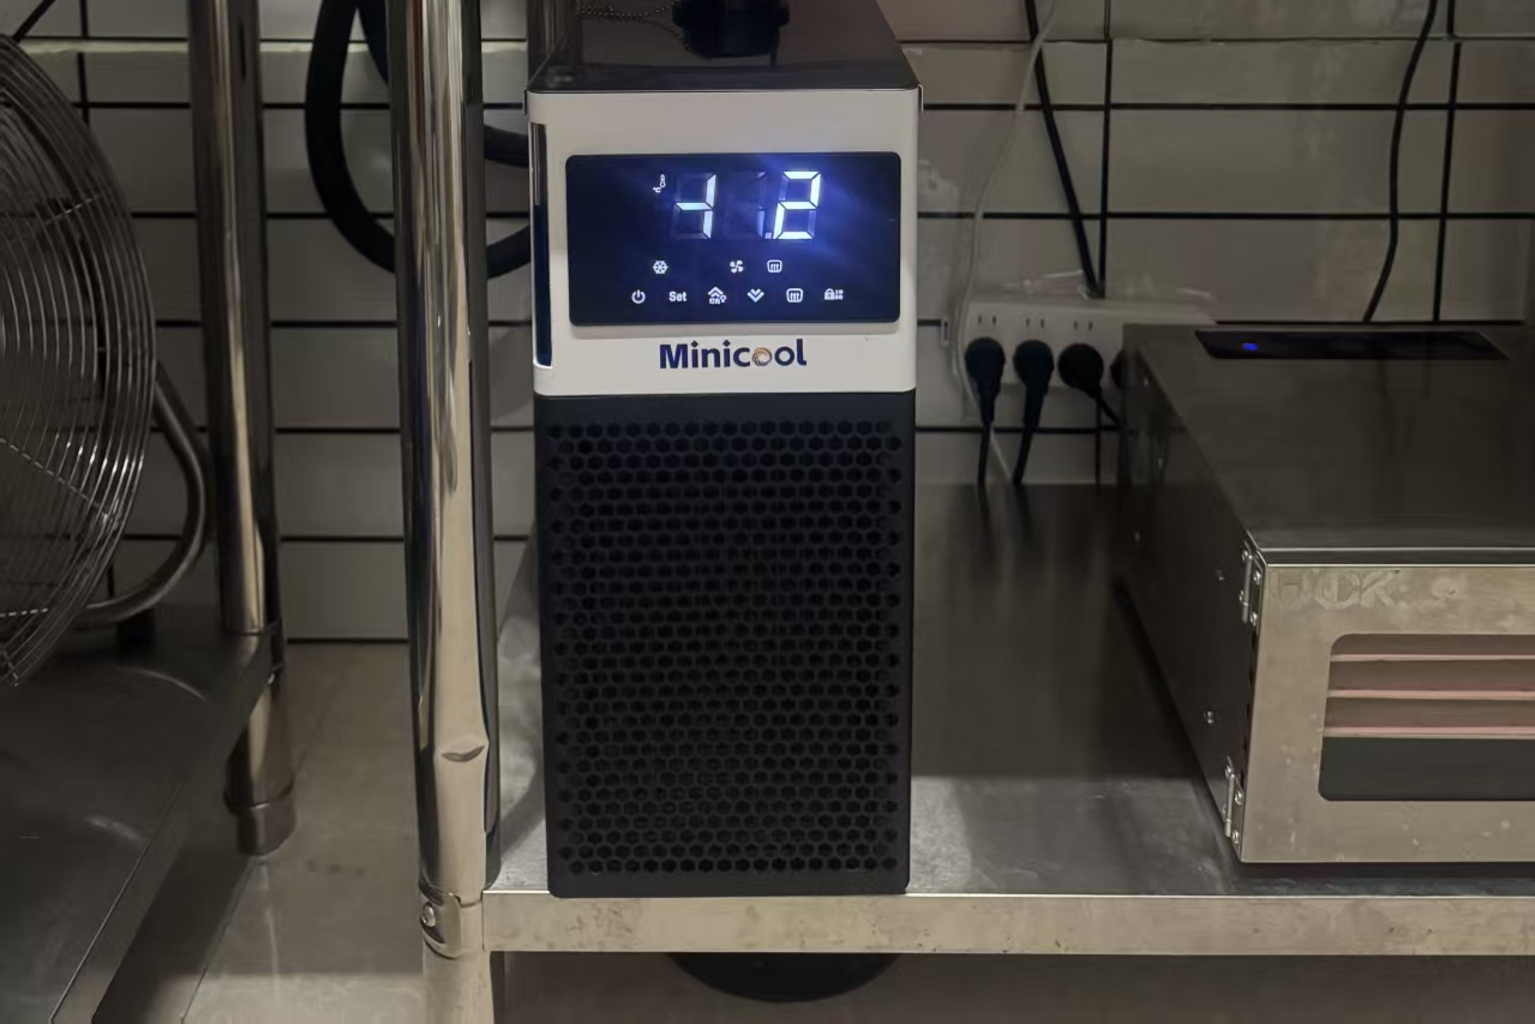
Under the bench, on a lower shelf
If bench surface space is at a premium but floor/shelf space below is available, under-bench placement frees your working area entirely. This works well when coolant lines can route upward through a bench grommet or around the back edge.
Requirements: total height (including connections) must fit the under-bench clearance, airflow exhaust direction must not be blocked by the bench above or walls on either side, and you need enough access to adjust settings or check coolant level periodically.
Inside a fume hood
For applications where both the instrument and chiller benefit from containment — particularly when working with volatile solvents or generating fumes — placing the chiller inside the fume hood alongside the instrument eliminates external coolant routing entirely.
Requirements: the chiller must be small enough to share hood space with your apparatus, its heat exhaust must be compatible with the hood’s airflow pattern (ideally exhausting toward the rear), and you should verify that the chiller’s operating temperature range accounts for the slightly elevated ambient temperature inside an active fume hood.
On a rolling cart for shared use
In facilities where one chiller serves multiple setups — perhaps a shared rotovap station and a separate reactor setup in the same lab — mounting the chiller on a small rolling cart allows it to move between stations. This is practical only if the chiller is light enough to make the cart stable (top-heavy carts are a safety hazard) and robust enough to handle repeated repositioning.
Requirements: weight low enough for a small cart (under 20 kg is ideal), durable coolant connections that tolerate repeated connect/disconnect cycles, and quick-connect fittings to minimize setup time at each station.
Key Specs to Compare When Space Is Limited
When evaluating a compact laboratory chiller for a space-constrained environment, these are the specifications that directly determine whether a unit will physically work in your intended location.
| Factor | What to Check | Why It Matters |
|---|---|---|
| Footprint | Length × Width in cm | Must fit your available bench or shelf space |
| Height | Total H including connections and caps | Determines under-bench clearance compatibility |
| Weight | Operating weight in kg | Can one person safely move and position it? |
| Noise | dB measured at 1 meter | Bench-adjacent placement demands quiet operation |
| Airflow direction | Front, side, or rear exhaust | Must not be blocked by walls, equipment, or bench structure |
| Connection ports | Location, size, and orientation | Must physically reach your equipment with available tubing |
A few additional considerations worth checking: Does the unit require rear clearance for ventilation? Some chillers need 10–15 cm of open space behind them, which effectively increases their depth. Are the coolant ports on the top, rear, or side? Top ports are ideal for under-bench placement; rear ports work better for on-bench use beside an instrument. Is the power cord exit location compatible with your bench layout, or will it need to route awkwardly?
Making the Right Choice for Your Lab
Choosing a compact laboratory chiller is fundamentally about matching real specifications to real spatial constraints. Measure your available space — not approximately, but precisely. Note the clearance above, beside, and behind the intended position. Identify where your nearest power outlet and instrument connections are. Then compare those measurements against the chiller’s published dimensions, including connections and required airflow clearances.
For labs where bench space and portability are primary concerns, the RIGID MiniCool™ recirculating lab chiller represents what modern compact design can achieve: a 200 × 430 × 450 mm footprint that fits on a standard bench or under it, 450W to over 1kW of cooling capacity, a temperature range from -40°C to 0°C with ±0.1°C precision. At under 20 kg, one person can position it without assistance — eliminating the logistical friction that makes larger chillers impractical in shared or space-limited environments.
Whatever unit you select, prioritize verified dimensions over marketing descriptors. “Compact” means different things to different manufacturers. The numbers tell the real story.
Frequently Asked Questions
Can a compact lab chiller actually reach -40°C?
Yes. Modern variable-speed DC compressor technology allows sustained operation at -40°C within packages small enough for bench placement. The key is compressor efficiency — newer designs achieve low temperatures without the oversized condensers and fans that older technology required. Look for published cooling capacity specifications at your target temperature, not just the minimum temperature rating. A chiller rated to -40°C may have significantly reduced cooling capacity at that extreme compared to its performance at -20°C.
Is under-bench placement safe for a recirculating chiller?
Under-bench placement is safe and common, provided you verify three things: the unit’s total height fits within your clearance with room for air circulation above, the exhaust airflow direction isn’t blocked by the bench structure or adjacent items, and you can still access the unit for coolant checks and maintenance. Avoid enclosed cabinets without ventilation — the chiller rejects heat and needs that heat to dissipate. An open lower shelf or a ventilated cabinet works well.
How much bench space does a compact chiller actually need?
A genuinely compact unit — one designed specifically for bench use rather than a scaled-down floor model — needs its own footprint plus clearance for airflow. For a unit measuring approximately 20 × 43 cm, plan for roughly 25 × 50 cm of total bench space including minimal side clearance. That’s less area than a standard laboratory hotplate-stirrer, and considerably less than most analytical instruments. The footprint is comparable to a stack of two large lab notebooks placed side by side.
What maintenance does a compact lab chiller require?
Routine maintenance is straightforward: check coolant level weekly (or as indicated by the unit’s low-level alert), inspect tubing connections monthly for wear or leaks, and clean the condenser filter every 3–6 months depending on your lab’s dust environment. Compact units use the same coolant types as larger chillers — typically a water-glycol mixture for sub-zero applications. The smaller reservoir volume means coolant changes are quick and use less material. Keep spare tubing and fittings on hand, and replace coolant per the manufacturer’s recommended schedule.