
How a Compressor Mini Fridge Actually Works — The Technology Inside Every Cold Box
Every compressor mini fridge uses the same fundamental technology that has cooled food since the 1930s: vapor-compression refrigeration. A refrigerant fluid circulates through a closed loop, changing between liquid and gas states to absorb heat from inside the fridge and reject it to the outside air. The compressor is the engine that drives this cycle.
Understanding how this works is not academic — it is practical knowledge that helps you choose the right mini fridge, troubleshoot problems, and build your own custom cooling projects. It also explains why compressor mini fridges dramatically outperform the thermoelectric (Peltier) and absorption alternatives you see marketed as “silent” or “energy-efficient” options.
The Four Components of a Compressor Mini Fridge
1. Compressor
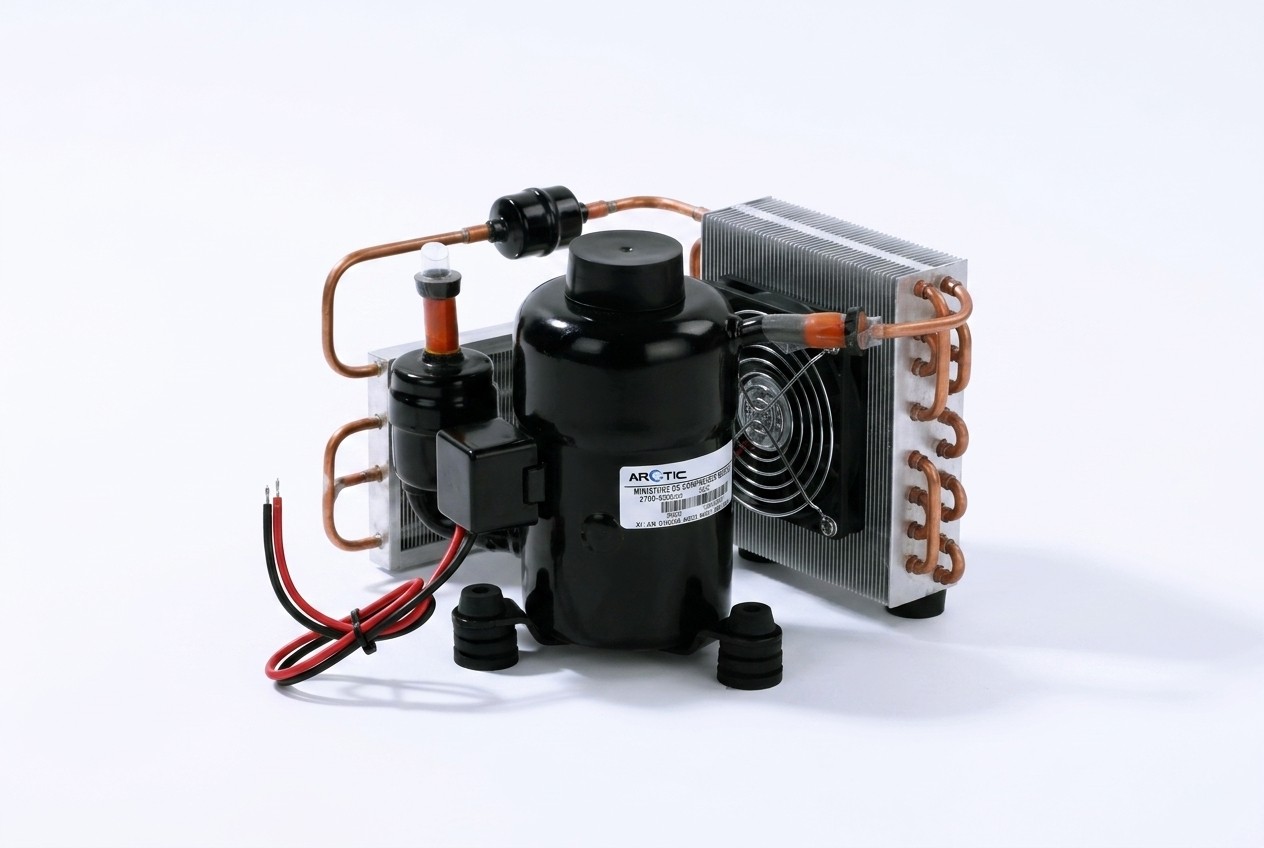
The compressor is a small electric motor-driven pump that compresses low-pressure refrigerant gas into high-pressure, high-temperature gas. This compression raises the refrigerant’s temperature well above the surrounding air temperature, which is necessary for the next step — rejecting heat to the outside. The compressor is the only moving part in the refrigeration loop and the component that consumes the most electricity.
2. Condenser
The condenser is the coil on the back or bottom of the fridge where hot refrigerant gas releases its heat to the surrounding air. As the high-pressure gas cools, it condenses into a high-pressure liquid. You can feel this heat by touching the back of any running fridge — that warmth is the heat being removed from inside the fridge. The condenser is aided by natural convection or a small fan that moves air across the coil.
3. Expansion Device (Capillary Tube)
The high-pressure liquid refrigerant passes through a narrow capillary tube (or expansion valve in larger systems). This sudden restriction causes the pressure to drop dramatically. As pressure drops, the refrigerant’s boiling point drops below the fridge’s interior temperature. The refrigerant begins to evaporate — and evaporation absorbs heat.
4. Evaporator
The evaporator is the cold coil inside the fridge — the part that actually makes things cold. Low-pressure refrigerant flows through this coil, evaporating from liquid to gas and absorbing heat from the fridge’s interior in the process. The air inside the fridge gets colder as its heat transfers to the evaporating refrigerant. The now-gaseous refrigerant returns to the compressor to repeat the cycle.
This cycle repeats continuously (or intermittently, controlled by a thermostat) to maintain the desired interior temperature. It is elegant, efficient, and proven over nearly a century of use.
Compressor vs Thermoelectric vs Absorption: The Three Mini Fridge Technologies
Thermoelectric (Peltier) Mini Fridges
Thermoelectric coolers use a semiconductor junction that creates a temperature difference when current flows through it — one side gets cold, the other gets hot. They are marketed as “silent” and “no moving parts” (though they still need a fan on the hot side).
The reality:
- COP of 0.3-0.7 means they use 1.5-3x more electricity than a compressor for the same cooling effect
- Maximum temperature reduction of 15-20°C below ambient — if the room is 30°C, the best they can do is about 10-15°C inside. That is not cold enough for safe food storage
- Cooling capacity drops as the temperature difference increases — they get worse exactly when you need them most
- Suitable only for keeping already-cold items cool in a moderate room. They cannot reliably maintain 4°C food-safe temperatures in warm environments
Absorption Mini Fridges
Absorption fridges use heat (from a gas flame, electric heater, or waste heat) to drive the refrigeration cycle instead of a compressor. Common in hotel rooms and RVs because they are silent (no compressor vibration).
The reality:
- Extremely inefficient — COP of 0.1-0.3 (the worst of all three types)
- Very slow cooling — reaching temperature takes hours, not minutes
- Highly sensitive to leveling — must be nearly perfectly horizontal to function properly
- Limited cooling capacity — struggle in ambient temperatures above 30°C
- Can run on propane (useful for camping), but electric absorption fridges are energy hogs
Compressor Mini Fridges
Compressor fridges use the vapor-compression cycle described above. They are the technology used in every household refrigerator, every commercial cooler, and every serious cooling application.
The reality:
- COP of 1.5-3.0 — the most efficient by far
- Can cool to -18°C or below (freezer temperatures) regardless of ambient conditions
- Fast cooldown — reaches temperature in 15-30 minutes typically
- Works in any orientation (with minor restrictions for oil circulation)
- Reliable food-safe temperatures in any climate
Why 12V DC Compressors Are Better for DIY Mini Fridge Builds
If you are building a custom mini fridge — for a van, boat, off-grid cabin, portable cooler, or any non-standard application — a 12V DC compressor offers specific advantages over conventional AC compressors:
Direct Battery Power
A 12V DC compressor runs directly from any 12V battery without an inverter. No AC power needed. No conversion losses (inverters waste 10-15% of energy as heat). Connect two wires to a battery, and you have refrigeration. This simplicity is transformative for mobile and off-grid applications.
Variable Speed Control
BLDC (brushless DC) compressors include an electronic driver that varies the motor speed continuously. Instead of cycling on at full power and off (like conventional AC compressors), a 12V BLDC compressor modulates: fast during initial cooldown, slow during temperature maintenance. This provides better temperature stability, lower average power consumption, and dramatically less noise at low speeds.
Compact Size and Light Weight
The RIGID QX1901VDL(H) 12V DC compressor weighs 0.72 kg (1.6 lbs) and delivers up to 455W of cooling capacity. A conventional AC compressor with comparable output weighs 3-8 kg. For portable and space-constrained builds, this 5-10x weight reduction is decisive.
Pre-Charged Refrigerant
RIGID 12V compressor modules come with pre-charged refrigerant (R134a) and sealed connections. You do not need refrigerant handling equipment, EPA certification, or specialized tools. Connect the compressor to the heat exchanger using the provided fittings, wire to 12V power, and the system is operational. This makes DIY builds accessible to anyone with basic mechanical skills.
How to Build a DIY Compressor Mini Fridge
What You Need
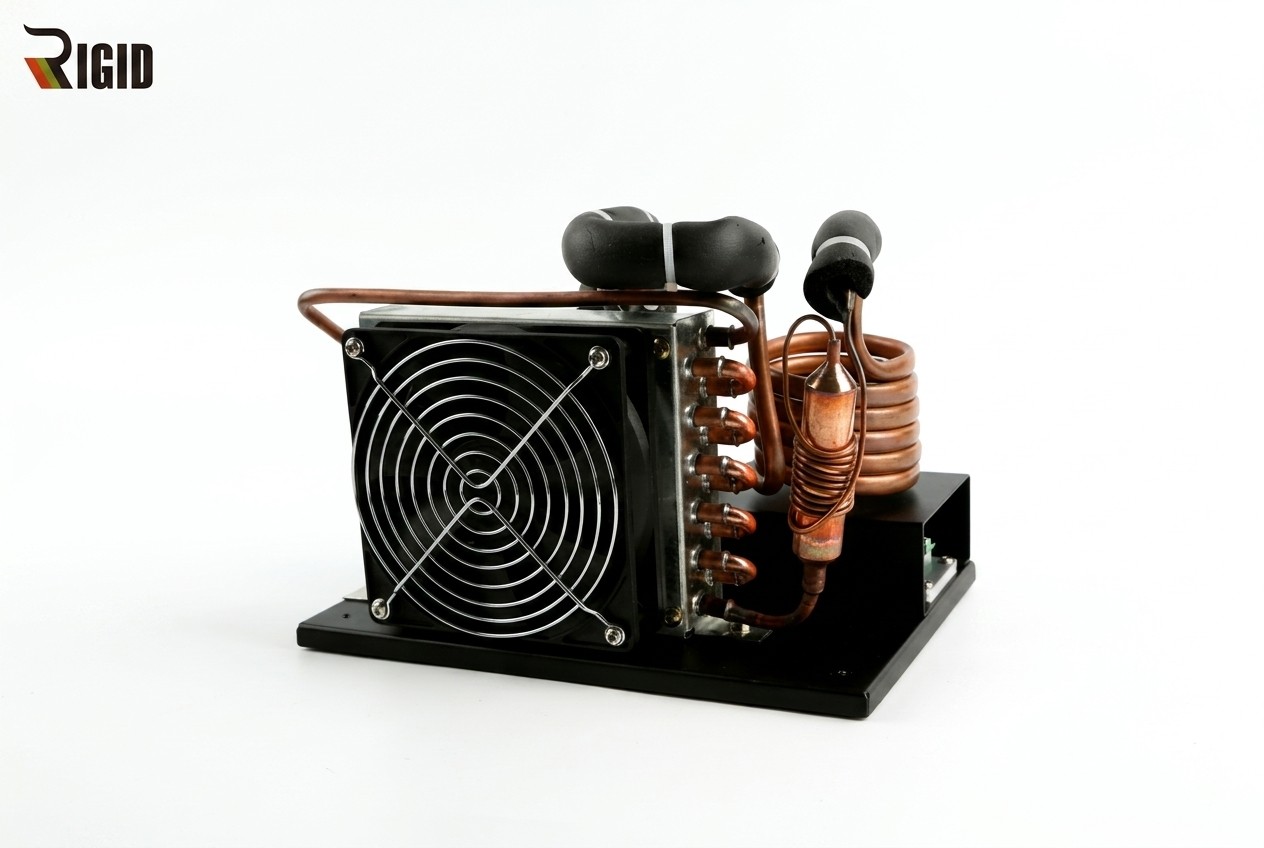
- 12V DC compressor module (RIGID QX1901VDL(H) or similar) — includes compressor, driver board, and refrigerant
- Evaporator: Aluminum or copper plate/coil that goes inside the insulated box. Available as pre-made units or DIY from copper tubing.
- Condenser: Fin-and-tube or coil that mounts outside the box. The hot side — needs airflow.
- Insulated box: Cooler, custom-built box with foam insulation, or repurposed mini fridge cabinet. Thicker insulation = better efficiency. Minimum 50mm polyurethane or equivalent.
- Temperature controller: Simple digital thermostat ($10-20) that turns the compressor on/off based on interior temperature. For BLDC compressors with variable speed, a 0-5V or PWM signal from the controller adjusts speed directly.
- 12V power source: Battery, solar panel + charge controller, vehicle electrical system, or 12V power supply from AC mains.
- Wiring: Appropriately gauged wire (10-14 AWG for typical runs under 2m at 12V), inline fuse, and connectors.
Build Steps
- Prepare the insulated box. Cut holes for refrigerant line pass-through and condenser mounting. Seal all gaps with expanding foam — every air leak reduces efficiency.
- Mount the evaporator inside. Position for maximum air circulation. The evaporator should not be pressed against food — leave space for airflow around it. A small 12V fan (1-2W) circulating air over the evaporator dramatically improves cooling uniformity.
- Mount the condenser outside. Ensure clear airflow around the condenser — do not press it against a wall. A small fan across the condenser improves heat rejection, especially in warm environments.
- Connect refrigerant lines between compressor, condenser, and evaporator per the manufacturer’s instructions. Pre-charged systems use quick-connect or flare fittings — no brazing required.
- Wire the compressor to your 12V power source through an inline fuse. Connect the temperature controller to the compressor’s speed control input (or to a relay for on/off control).
- Test and adjust. Power on, set your target temperature (4°C for general food storage), and monitor. The system should reach temperature within 30-60 minutes depending on the insulated box volume and ambient temperature.
Performance Expectations for DIY Builds
A well-built DIY compressor mini fridge using a 12V BLDC compressor typically achieves:
- Interior temperature: 0-5°C in ambient up to 35°C (or -10°C to -18°C for freezer builds with adequate insulation)
- Cooldown time: 20-60 minutes from ambient to target, depending on box volume and insulation
- Power consumption: 1-4 Ah per hour at 12V during steady-state operation (15-50W average). Initial cooldown draws more.
- Battery runtime: A 100Ah 12V LiFePO4 battery runs a well-insulated DIY mini fridge for 24-72+ hours depending on ambient temperature and door opening frequency
- Noise: BLDC at low speed is nearly inaudible. At full speed, comparable to a quiet desktop fan.
Common DIY Build Mistakes
- Insufficient insulation. The single biggest factor in mini fridge performance. 25mm of insulation is not enough — use 50mm minimum, 75mm for freezer builds. Every millimeter of insulation reduces power consumption and extends battery runtime.
- Blocking condenser airflow. The condenser must reject heat to the outside air. Pressed against a wall with no airflow, it overheats and the system shuts down on thermal protection. Leave at least 50mm clearance on all sides, or add a fan.
- Undersized wiring. A 12V compressor drawing 30A through thin wire creates voltage drop that reduces performance and can overheat the wire. Use a wire gauge calculator for your wire length and current — when in doubt, go one size thicker.
- No drain for condensate. The evaporator produces condensation (and frost in freezer mode). Without a drain, water accumulates inside the box. Route a small drain tube from below the evaporator to outside the box.
- Sealing gaps poorly. Air leaks around the lid, door, or line pass-throughs constantly let warm air in. Use weatherstripping on doors and expanding foam around line penetrations. A poorly sealed box can double power consumption.
Cost Comparison: DIY vs Commercial Mini Fridge
Building a DIY compressor mini fridge costs more upfront than buying a cheap thermoelectric cooler, but the performance difference is enormous — and it often costs less than buying a quality commercial 12V compressor fridge.
| Option | Cost | Cooling Performance |
|---|---|---|
| Thermoelectric mini fridge (commercial) | $50-$150 | 15-20°C below ambient max, COP 0.3-0.7 |
| Absorption mini fridge (commercial) | $100-$300 | Slow, orientation-sensitive, COP 0.1-0.3 |
| DIY 12V compressor mini fridge | $200-$400 | Reaches 0-5°C reliably, COP 1.5-3.0 |
| Commercial 12V compressor fridge | $400-$1,200 | Same performance as DIY, polished finish |
The DIY route gives you commercial-grade compressor performance at roughly half the price of a brand-name 12V fridge — plus complete customization of size, shape, and features. The tradeoff is your time and the utilitarian aesthetic of a homemade build. For van life, boat, and off-grid applications where function matters more than appearance, the DIY compressor mini fridge is the best value option available.
Frequently Asked Questions
How long do compressor mini fridges last?
A quality BLDC compressor is rated for 50,000+ operating hours — roughly 5-10 years of continuous operation. The compressor is typically the last thing to fail. Electronics, fans, and seals usually need attention first. A well-maintained DIY build should last as long as a commercial mini fridge.
Are compressor mini fridges noisy?
Conventional fixed-speed compressor mini fridges cycle on and off with an audible click and hum. BLDC variable-speed compressors eliminate the cycling noise entirely — they run continuously at varying speed, producing a quiet, steady hum that most people find less noticeable than on-off cycling. At low speed (steady-state), they are comparable to thermoelectric models in noise.
Can I use a car fridge compressor for a DIY build?
Car fridge compressors (like those in portable car coolers) are 12V compressors designed for cooling applications. However, they are typically sealed units not intended for DIY integration — the refrigerant circuit is closed and cannot be connected to external heat exchangers. A RIGID modular compressor is designed specifically for custom integration, with separate condenser and evaporator connections.
Bottom Line
A compressor mini fridge works by circulating refrigerant through a vapor-compression cycle — the same proven technology in every household refrigerator. It dramatically outperforms thermoelectric and absorption alternatives in efficiency, cooling capacity, temperature range, and reliability. For DIY builds, a 12V DC BLDC compressor delivers compressor-grade cooling in a compact, lightweight, battery-compatible package that anyone with basic skills can integrate into a custom mini fridge. Whether you are building a van fridge, a portable cooler, an off-grid food storage solution, or a specialty cooling project, a 12V compressor is the right foundation.