
You powered up the cooling vest rig thirty minutes ago. The cold hit immediately — relief flooded through the suit tubing, skin temperature dropped, and the crew looked comfortable. Then, somewhere around the half-hour mark, the complaints started: “It was cold, now it’s not doing anything.” Sound familiar?
If you manage cooling systems for industrial heat-exposure crews — foundry workers, welders in enclosed vessels, asphalt teams, or hazmat responders — you have heard this exact sentence dozens of times. The vest “stops working.” The operator assumes the unit is broken. The safety manager wonders if the money was wasted.
It almost never is. Cooling vest performance dropping over time is real, measurable, and — in the vast majority of cases — traceable to a short list of root causes that have nothing to do with the compressor. This article walks through those causes one by one, with the field-note detail that helps you fix the problem on a Monday morning when it’s 105 °F and the crew is waiting.
Why Cooling Vest Performance Drops Over Time: The Core Mechanism
Before we troubleshoot, let’s clarify what “stops working” actually means in thermodynamic terms. A cooling vest circulates chilled liquid — typically water or a water-glycol mix — through flexible tubing that runs across the torso. The liquid absorbs body heat through conduction, carries that heat away, and returns to a chiller unit where the heat is rejected. The cycle repeats.
When performance degrades, one of these things is happening:
- The liquid isn’t moving fast enough (flow-rate problem)
- The liquid isn’t cold enough (chiller capacity or ambient-load problem)
- The liquid isn’t making good contact with the body (fit or garment issue)
- The system is fighting conditions beyond its design envelope (environmental mismatch)
That’s it. Every single “it stopped working” complaint traces back to one — or a combination — of those four categories. Let’s break each one open.
Cause #1: Flow Rate Drops — The Silent Killer
This is the number-one field cause. It isn’t dramatic. There’s no alarm, no visible leak, no error light. The pump is running, the compressor is humming, but the water is barely trickling through the vest tubing.
Why flow rate drops
Kinked or pinched tubing. The operator sits down, leans against a wall, or routes the supply hose under a harness strap. The soft tubing collapses partially. Flow drops by 40–60% (field estimate), and within minutes the vest tubing warms to body temperature. The operator feels “nothing” even though the chiller outlet temperature is still ice-cold. This is the single most common cause we see on job sites.
Connector restrictions. Quick-disconnect fittings are convenient, but every fitting is a restriction point. If the system uses multiple QD couplings in series — say, one at the chiller, one at the belt pack, one at the vest — the cumulative flow loss can be significant. Over time, the spring-loaded valves inside QDs can weaken or collect debris, making the restriction worse.
Pump wear or air lock. Submersible pumps in reservoir-style systems can lose prime if the reservoir level drops. Even a small air bubble trapped at the pump inlet can reduce output substantially. If you hear the pump cycling or buzzing irregularly, check the water level first.
Field fix checklist — flow rate
- Trace the entire hose path from chiller outlet to vest inlet and back. Look for kinks, tight bends, and compression points under straps.
- Disconnect and reconnect every QD fitting. Flush with clean water if sticky.
- Check reservoir level. Top off with distilled water or the manufacturer’s recommended coolant.
- With the system running, pinch the return hose gently — you should feel pulsing flow. A weak dribble means a pump issue or upstream restriction.
- Diagnostic shortcut: disconnect the vest, let the chiller circulate into a bucket. Strong flow means the problem is in the vest or hose run; weak flow points to the chiller or pump.
Cause #2: Inadequate or Unstable Power Supply
This is the second most common cause, and it’s the one that catches people off guard — because the system appears to be running normally.
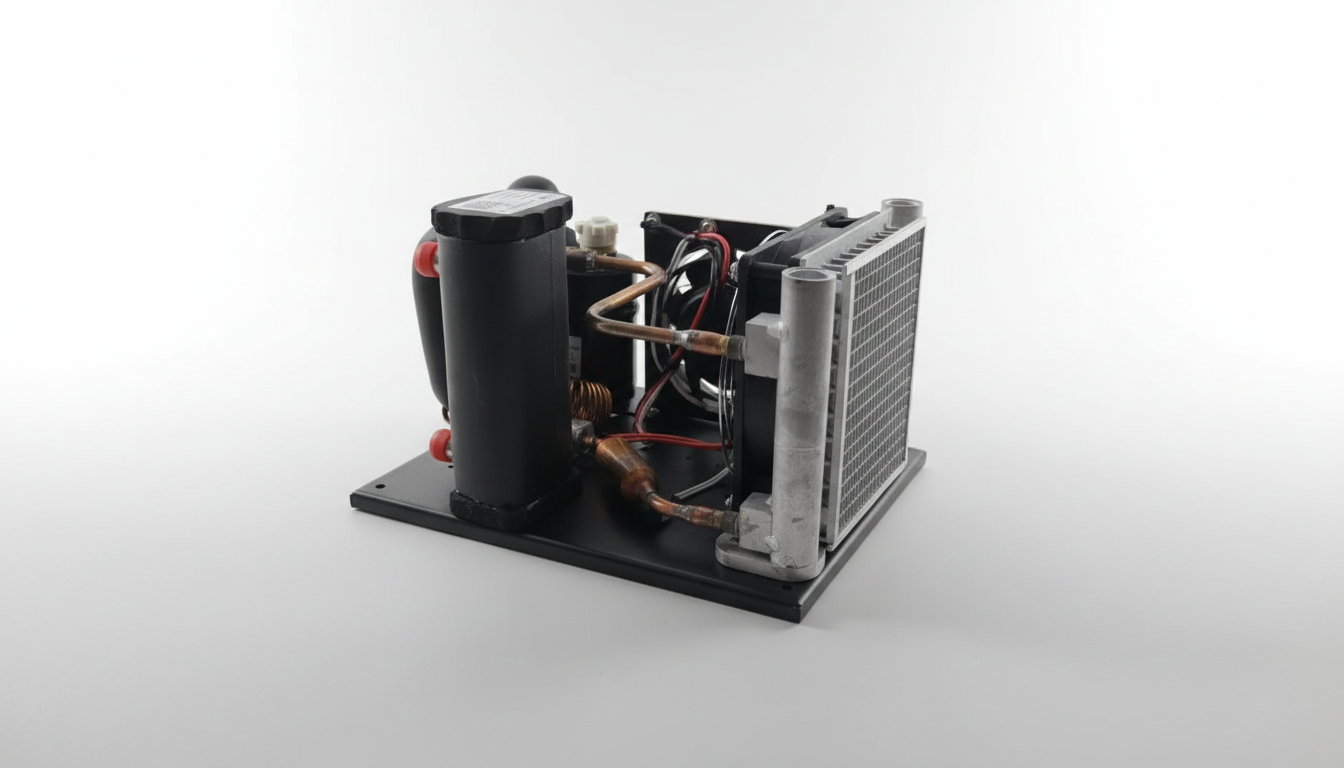
Compressor-based cooling systems draw meaningful current. The RIGID Micro Cooler, for example, has a maximum amp draw rated between 18–22 amps depending on installation and environmental conditions. That’s not a trivial load. If the power source can’t sustain that draw continuously, the compressor cycles off or throttles down, and cooling output drops — sometimes gradually, sometimes abruptly.
Common power problems in the field
Undersized battery. A 12V battery that’s nominally rated for the right amp-hours but has degraded capacity (common in hot environments where batteries age faster) may deliver full power for 20–30 minutes, then voltage sags below the compressor’s operating threshold. This matches the “starts cold, dies after half an hour” complaint almost perfectly.
Voltage drop over long cable runs. In vehicle installations, the cable from the battery to the cooling unit might be 10, 15, even 20 feet. If the wire gauge is too small for the current draw, resistance eats voltage. A system that needs 12V to run its compressor efficiently might only be seeing 10.5V at the end of a long, thin wire — especially under load. The compressor still runs, but it can’t develop full head pressure, and cooling capacity suffers.
Shared circuits. The cooling system is plugged into the same circuit as other equipment — radios, fans, lights, tool chargers. As those loads cycle on, available amperage for the cooler fluctuates. The compressor may not trip off, but it won’t perform at spec either.
Generator instability. On remote job sites powered by portable generators, voltage and frequency fluctuations are common. Some compressors are more sensitive to dirty power than others. If the cooling system works fine on shore power but acts up on the generator, this is your likely culprit.
Field fix checklist — power
- Measure voltage at the cooler’s power input terminals (not at the battery) while under load. More than 0.5V below nominal means a wiring or source problem.
- Check wire gauge against run length and current draw. For 18–22 amps at 12V, field techs typically recommend 10 AWG or heavier for runs over 6 feet.
- Dedicate a circuit — don’t share the cooler’s feed with intermittent high-draw equipment.
- For batteries, check state of health under load, not just resting voltage. A sulfated battery shows 12.6V at rest but collapses under a 20-amp draw.
Cause #3: Coolant Issues — Temperature, Level, and Contamination
The liquid circulating through the system is the heat-transfer medium. If it’s compromised, everything downstream suffers.
Temperature creep
In extreme heat — direct sun on the chiller, ambient above 110 °F, or operating inside a furnace enclosure — the condenser can’t reject heat fast enough. Coolant outlet temperature gradually climbs. The vest still cools relative to ambient, but not with the same delta-T the operator felt at startup. This is physics, not malfunction.
How to tell: touch the outlet hose. If it’s cool but not cold, and the inlet is only slightly warmer, the condenser is heat-soaked. Move the chiller to shade or improve airflow around it.
Low coolant level. Evaporation, slow leaks, or not topping off — low coolant means the pump cavitates, flow becomes intermittent, and cooling feels inconsistent. Easy to miss because the system keeps running.
Contaminated coolant. Over weeks, biological growth (algae, biofilm), mineral deposits from tap water, or debris from degraded hoses accumulate. Internal passages narrow, flow resistance increases, and heat transfer surfaces get insulated. Cloudy coolant, off smell, or visible particles? Time for a flush-and-refill.
Field fix checklist — coolant
- Check level first. Always.
- Use distilled water or the manufacturer-recommended coolant. Tap water introduces minerals that scale over time.
- Flush the entire loop (chiller, hoses, vest) with a mild cleaning solution (vinegar-water works for light buildup) at least once per season, or more often in heavy-use environments.
- If the system has been sitting unused for weeks, drain, flush, and refill before deploying.
- Consider adding a biocide approved for use with your system’s materials if you operate in warm, humid climates where biological growth is aggressive.
Cause #4: Vest Fit and Contact Problems
This one is overlooked constantly because it’s not a “system” problem — it’s a wearability problem. But it has a direct, measurable impact on cooling effectiveness.
Cooling vests work by conduction: cold tubing pressed against skin (or a thin base layer) transfers heat. If the vest shifts, bunches up, or the operator wears a thick undershirt, the thermal contact degrades. The tubing is still cold — touch it and you’ll feel it — but the body isn’t receiving the benefit.
Common fit issues
- Over-sized vest: Tubing doesn’t maintain contact with the torso. Air gaps act as insulation.
- Too many layers underneath: A cotton t-shirt is fine. A heavy thermal base layer or thick FR shirt creates a barrier.
- Vest migration: During physical work — climbing, bending, reaching — the vest rides up or shifts. Tubing that was on the chest is now bunched at the shoulders.
- Sweat saturation: In some garment designs, heavy sweating can create a layer of warm moisture between the skin and tubing that actually insulates rather than helps. This is counterintuitive but real in certain conditions.
Field fix checklist — fit
- Size the vest correctly. Loose is not better. Snug contact across the torso is the goal.
- Wear a thin, moisture-wicking base layer — not cotton, not heavy FR fabric — directly under the vest.
- Use adjustable straps or compression features to keep the vest in position during movement.
- Check in with operators after 20 minutes: has the vest shifted? If yes, re-adjust and tighten.
Cause #5: Environmental Conditions Beyond the System Envelope
Every cooling system has a design envelope. Operating outside it doesn’t mean the system is broken — it means you’re asking more than it was sized for.
Extreme ambient heat (>120 °F / 49 °C). Inside boiler rooms or in direct desert sun with reflected heat, the condenser can’t reject heat fast enough. The compressor works harder, runs hotter, and cooling output drops.
High radiant heat loads. Standing near molten metal, a kiln, or an engine block adds a radiant load that dwarfs ambient air temperature. The vest is still helping — it’s just being overwhelmed.
Sustained high metabolic output. Heavy physical labor generates 300–600 watts of metabolic heat (field rule of thumb — actual values vary). If work intensity is high, the vest’s capacity may not cover the full thermal load. The operator still benefits, but may not “feel cold” the way they did at startup while standing still.
Mitigations
- Relocate the chiller away from heat sources into the best available airflow.
- Add shade or a reflective barrier between the heat source and the chiller.
- Implement work-rest cycles — the vest extends safe work time but doesn’t eliminate break requirements.
- Set expectations: the vest maintains a delta-T, not an absolute setpoint. In a 130 °F environment, vest tubing at 70 °F is a 20+ degree difference — physiologically significant, even if it doesn’t feel “icy.”
Cause #6: Tubing Blockage and Internal Restrictions
Less common than the causes above, but worth checking when everything else looks right.
Over time, internal tubing in the vest or the supply hoses can develop restrictions:
- Mineral scale: Hard water deposits, especially at heat-exchange surfaces.
- Biofilm: Slimy biological buildup in warm, stagnant sections of tubing.
- Tubing collapse: Some soft tubing materials lose rigidity with age, especially if exposed to UV or chemicals. The tubing looks fine from outside but has partially collapsed internally.
- Debris: Small particles from degraded O-rings, pump impellers, or the reservoir can migrate and lodge at narrow points — especially at vest tubing junctions.
Diagnostic approach
Disconnect the vest from the supply hoses. Run water through the vest tubing manually (attach a garden hose or use a squeeze bottle at one end). Watch the flow at the other end. It should be smooth and consistent. If it sputters, trickles, or doesn’t flow at all through certain zones, you’ve found your blockage.
For supply hoses: hold them up to the light (if translucent) and look for discoloration or visible buildup. Flex the hose along its length — a section that feels stiffer than the rest may be scaled internally.
Building a Systematic Troubleshooting Protocol
If you’re a safety manager or maintenance lead, you need a repeatable process. Here’s a field-tested sequence from most-likely to least-likely:
- Verify power. Measure voltage at the unit under load.
- Check coolant level. Takes 30 seconds.
- Trace the hose path. Every inch, chiller to vest and back. Kinks, pinches, QD restrictions.
- Test flow rate. Disconnect vest, run pump into open container, observe.
- Assess ambient conditions. Chiller in sun? Near a heat source? Condenser blocked?
- Evaluate vest fit. Snug? Correct layers?
- Inspect coolant quality. Color, clarity, odor.
- Check tubing integrity. Flush vest independently.
Post this on the equipment locker. When someone says “it stopped working,” steps 1–4 take under five minutes and resolve the majority of issues on the spot.
When It’s Not the Vest: Sensory Adaptation
There’s one more factor that doesn’t fit the troubleshooting list: the human body acclimates to temperature stimuli. When you first put on a cooling vest, the contrast between warm skin and cold tubing is vivid. After 20–30 minutes, skin temperature has dropped, the contrast shrinks, and the sensation fades — even if cooling output hasn’t changed. Same reason you “stop feeling” a cold pool after a few minutes.
For safety managers, this is a critical education point. “Not feeling it” doesn’t mean “not working.” If core temperature data shows a maintained or lowered temperature, the system is doing its job. That said, don’t dismiss complaints — use them as triggers to run the troubleshooting protocol. It might be adaptation, or it might be a real issue hiding behind assumption.
Choosing the Right Cooling Unit for Industrial Applications
Some cooling vest setups are more prone to the problems above than others. Ice-based systems have a built-in performance cliff: once the ice melts, cooling stops entirely. No gradual degradation — binary on/off, and “off” arrives exactly when the operator needs cooling most.
Compressor-based systems eliminate that cliff. They deliver continuous cooling as long as they have power and airflow. The RIGID Micro Cooler, weighing under 7 kg (15 lbs) with cooling capability below 35 °F, uses a sealed Freon-based rotary micro-compressor that runs maintenance-free — plug-and-play with remote-control operation.
But even compressor systems have boundaries. They need adequate power (18–22 amps maximum draw for the Micro Cooler, depending on conditions), condenser airflow, and proper hose routing. The troubleshooting guidance above applies to any compressor-based cooling vest setup, including the Micro Cooler.
Where compressor-based personal cooling fits well
- Extended shifts (4+ hours) where ice systems need multiple refills
- Vehicle-mounted or cart-mounted setups powered by the vehicle’s electrical system
- Remote sites, offshore platforms, and enclosed spaces where ice supply is impractical
- Applications requiring consistent output, not a gradually-warming meltwater curve
Where it may not be the right fit
- Fully untethered work with no power source — battery operation is possible, but weight and runtime need planning for the shift length
- Very short exposures (under 15 minutes) where a simpler phase-change vest may suffice
- Sealed environments with zero airflow — the chiller needs somewhere to reject the heat it removes
Preventive Maintenance: Keeping Performance Consistent
The best troubleshooting is the kind you never have to do. Build these habits into your crew’s routine:
Each shift: Check coolant level, inspect hose routing for kinks, verify power source charge, and confirm remote control operation.
Weekly: Run the system briefly and feel outlet temperature against your baseline sense (experienced techs develop a reliable “hand calibration” — note this is subjective, not a measurement). Inspect QD fittings and hoses for soft spots or UV degradation.
Monthly: Flush the coolant loop with fresh distilled water. Clean condenser fins with compressed air. Test battery health under load. Check electrical connections for corrosion.
Seasonally: Full coolant replacement, independent vest tubing flush, pump output check against baseline, and update your troubleshooting protocol poster with any new failure modes encountered.
Field Notes: Real Scenarios, Real Fixes
To ground this in reality, here are patterns from field reports (details generalized):
Scenario 1: Steel mill, summer shift. Operators reported cooling dropping after 25–30 minutes. The power feed was shared with LED work lights that cycled on and off, dipping the cooler’s voltage each time. Fix: dedicated 10 AWG feed. Problem gone.
Scenario 2: Road construction crew. Two of six vests “stopped working” mid-shift — both traced to kinked hoses tucked under tool belts. A simple rerouting guide (hose over the belt, secured with Velcro) eliminated the issue for the season.
Scenario 3: Shipyard, confined space. Performance degraded across all units over two weeks. Cause: crew topped off with dock water instead of distilled. Biofilm buildup. Full vinegar flush, distilled refill, and a standing order for proper coolant restored performance.
Scenario 4: Perception vs. reality. A petrochemical site safety manager measured skin temps on complaining operators — they were 4–6 °F lower than unvented workers doing identical tasks. The vests were working; operators had adapted. A brief training module on thermal adaptation cut complaints by half with zero equipment changes.
Closing Thoughts
When cooling vest performance drops over time, the cause is almost always identifiable and fixable with basic tools and a systematic approach. Power, flow, coolant, fit, and environment — check them in that order, and you’ll resolve the vast majority of issues before they become safety incidents.
The goal isn’t just to fix the problem once — it’s to build a maintenance and monitoring culture around your cooling equipment so that “it stopped working” becomes a rare event rather than a daily frustration.
If you’re planning a cooling vest deployment for industrial crews, or if you need help diagnosing a persistent performance issue with your current setup, RIGID’s integration support team can assist with system sizing, installation planning, and troubleshooting guidance tailored to your specific environment. Reach out through the product page to start a conversation about your application.